


Boiling out a grinder: how to get your grinder clean again

The key points at a glance:
Why should you boil out your grinder?
Find out why boiling out your grinder is one of the best methods for removing stubborn residue and extending your grinder's lifespan.
Learn more
Step-by-step guide to boiling out your grinder
Follow our step-by-step guide to effectively boil out your grinder and get it back into top condition.
Learn more
Additional tips and tricks for cleaning your grinder
In this section you can find out more about the current state of research into pain therapy with CBD.
Learn more
Anyone who regularly consumes cannabis knows the problem: over time, the grinder gets dirty and resinous. These residues not only impair the grinder's functionality, but can also negatively affect the taste of your herb. There are various cleaning methods to get your grinder back into top condition. A particularly effective and thorough method is boiling out the grinder.
Boiling out dissolves stubborn residues and ensures your grinder looks and works like new again. In this article, you'll learn how to boil out your grinder, which materials are suitable for it and which tips and tricks will help you get your grinder spotlessly clean again. Stay tuned and learn everything about cleaning your grinder so you can enjoy your equipment for a long time and always have the best smoking experience.
Why should you boil out your grinder?
There are plenty of good reasons why you should boil out your grinder regularly. Here are some of the most important ones:
1. Removing residue:
Over time, residues of cannabis and resin build up in your grinder. These residues can significantly impair your grinder's efficiency and make grinding more difficult. By boiling it out, you effectively dissolve these stubborn residues and ensure your grinder works flawlessly again.
2. Better taste:
A clean grinder allows your herb to develop its full flavour. Impurities and old residues can negatively affect the taste of your cannabis. With a thoroughly cleaned grinder, you enjoy a pure and unadulterated smoking experience every time.
3. Hygiene:
Cleaning your grinder regularly is also a question of hygiene. Boiling it out kills germs and bacteria that may have accumulated in the grinder. This ensures your grinder not only looks clean, but is also hygienically flawless.
4. Extended lifespan:
By cleaning and boiling out your grinder regularly, you extend its lifespan. A well-maintained grinder lasts longer and works better, saving you time and money in the long run.
5. More efficient grinding:
A clean grinder works more efficiently and lets you grind your herb evenly and finely. This makes for a better smoking experience and makes your grinder easier to use.
6. Deep cleaning:
Boiling out your grinder, especially in milk, provides a deep clean. Milk contains fats that can dissolve oils and resins even better than water. This way, your grinder is not only clean on the outside, but also thoroughly cleaned on the inside.
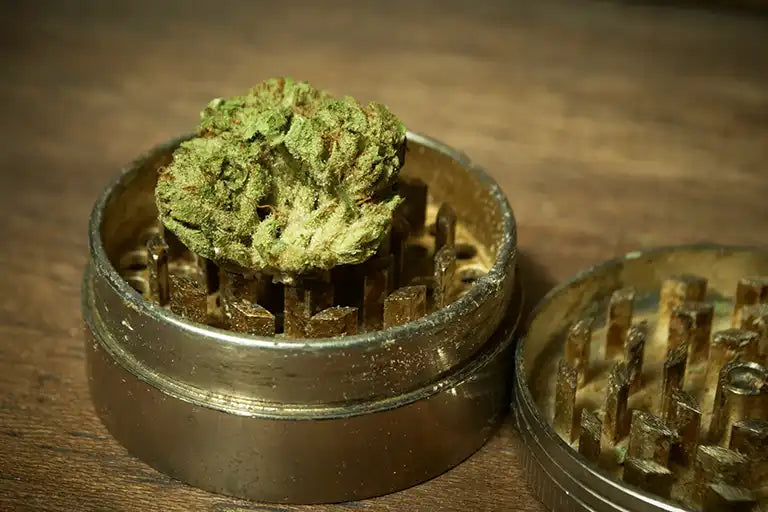
Step-by-step guide to boiling out your grinder
Now that you know why boiling out your grinder is so important, let's go through the steps for how to do it effectively. Follow this guide to make sure your grinder gets thoroughly cleaned.
Step 1: Prepare materials and tools
Before you start boiling out your grinder, make sure you have all the necessary materials and tools ready. You will need:
Your dirty grinder (made of metal or aluminium)
- A cooking pot
- Water
- Optional: milk (for a deeper clean)
- A soft brush or toothbrush
- A sieve (for removing the grinder)
- A towel or kitchen paper
Step 2: Disassemble the grinder
Take your grinder apart into its individual pieces. Remove all detachable parts such as the lid, the chamber and the sieve. This makes it easier to thoroughly clean each individual part.
Step 3: Heat the water (or milk)
Fill the pot with enough water so that the grinder parts are completely covered. If you want a particularly thorough clean, use milk instead of water. Heat the water or milk over medium heat until it is gently simmering.
Step 4: Boil out the grinder
Carefully place the disassembled grinder parts into the simmering water or milk. Leave the parts in the liquid for about 10–15 minutes to dissolve the residue. Make sure the liquid doesn't boil too vigorously to avoid damaging the grinder.
Step 5: Remove and clean the grinder
Remove the grinder parts from the water or milk using a sieve or tongs. Let them cool briefly and then clean them thoroughly with a soft brush or toothbrush. Pay particular attention to the teeth and grooves to remove any remaining residue.
Step 6: Rinse and dry
Rinse the cleaned grinder parts under warm water to remove any residue of water or milk. Then dry the parts thoroughly with a towel or kitchen paper. Make sure the grinder is completely dry before you reassemble and use it.
Here once again is all the important information from this section: take your grinder apart into its individual pieces, heat water or milk and let the parts simmer for 10–15 minutes. Then clean them with a soft brush and dry them thoroughly to make sure your grinder is free of residue and hygienically flawless.
Additional tips and tricks for cleaning your grinder
In addition to boiling out, there are a few more tips and tricks that can help you clean your grinder even more effectively and gently. These additional steps ensure your grinder lasts a long time and always works optimally.
1. Regular cleaning:
To prevent too much residue from building up, you should clean your grinder regularly. A quick rinse under warm water after each use can already make a big difference. You should plan a thorough boil-out at least once a month. For this, use for example the high-quality grinders from Medusafilters, which are especially durable and easy to clean.
2. Alcohol for a thorough clean:
Isopropyl alcohol is an excellent cleaning agent for cleaning your grinder. Soak the parts of your grinder in alcohol for about 30 minutes to dissolve stubborn residue. Then rinse thoroughly and let dry. This method is particularly well suited for metal and aluminium grinders.
3. Using toothpicks and brushes:
To get even the smallest grooves and teeth of your grinder clean, you can use toothpicks and small brushes. An old toothbrush or a special grinder brush is ideal for removing stuck-on residue.
4. Deep cleaning with milk:
As already mentioned, boiling out in milk is a very effective method for getting your grinder deeply clean. The fats in the milk dissolve the resins and oils particularly well. Make sure you don't heat the milk too much to avoid burning it. This way you can boil your grinder in milk and clean it thoroughly.
5. Dry the parts carefully:
After every cleaning, it's important to dry the parts of your grinder thoroughly to prevent rust from forming. Especially with metal and aluminium grinders, you should make sure no water is left behind. A soft towel or kitchen paper is best suited for this.
6. Care and storage:
Store your grinder in a dry and clean place. Regular care and proper storage ensure your grinder lasts longer and is always ready to use.
Perhaps also of interest to you?


Frequently asked questions about: boiling out your grinder
Before we finish, we'd like to answer some of the most common questions that can come up when cleaning and boiling out a grinder. This way you make sure you're well informed and no misunderstandings arise.
It's advisable to clean your grinder briefly after each use and to clean it thoroughly at least once a month. Regular cleaning prevents too much residue from building up and keeps your grinder efficient.
Yes, you can also boil out your grinder using only water. Milk is often used because the fats it contains are particularly effective at dissolving resins and oils. However, if you don't want to use milk, water works well too.
Grinders made of metal or aluminium are ideal for boiling out. Plastic grinders or grinders made of wood should not be boiled out, as the heat can damage these materials.
If your grinder is still sticky after boiling out, you can additionally soak it in isopropyl alcohol. The alcohol dissolves stubborn residue that boiling out didn't remove. Then rinse and dry thoroughly.
No, you should make sure your grinder is completely dry before you reassemble and use it. Moisture can lead to rust forming and impair your grinder's function.
As a general rule, always make sure to use high-quality products - both for cleaning, for care and for your grinder itself. Our products from Medusafilters are a genuine recommendation here and help you make your smoking experience more relaxed.
Our Medusafilters conclusion
Boiling out your grinder is a simple and effective method for cleaning it thoroughly and keeping it in top condition. If you want to clean your grinder in the best way, you should boil it out regularly and pay attention to high-quality materials. Boiling out your grinder with milk is particularly effective, as the fats it contains can dissolve the resins and oils even better. This method ensures your grinder is not only clean on the outside, but also deeply cleaned.
A clean grinder guarantees an unadulterated smoking experience and ensures your cannabis can develop its full flavour. Through regular care and cleaning, you extend your grinder's lifespan and make sure it always works efficiently. Be sure to dry the parts of your grinder thoroughly after boiling out to prevent rust from forming and to maintain functionality.
With the right materials and tools, plus a few helpful tips and tricks, you ensure your grinder lasts a long time and always works optimally. High-quality products from Medusafilters help you get the best out of your smoking experience. No matter which grinder you use, regular cleaning is the key to a long-lasting and high-performing product.